Hello,
We have a customer trying out a Memor 30 device, but they want to use multiple applications.
For one application we need to have a scanner profile that places a tab after a scan.
For the other application, we need to have an enter after a scan.
Is this possible by creating multiple scanner profiles of some sort?
I know Zebra devices can create multiple scanner profiles within Datawedge and assign them to applications.
We hope Datalogic also has something similar.
Thanks.
Kind regards,
Jorrit van Baak
Hello @Jorrit_van_Baak
Yes, it’s absolutely possible. You can Configure different scanning profiles for different applications on Memor 30, just like you do with Zebra Datawedge. The feature is available all the Datalogic devices starting from the FW that includes at least SDK 1.32 (see SDK - Supported devices Table)
Profiles and automatic ProfileRules can be created through the ProfileManager class of our Datalogic SDK, but the most easy way is by using the tool Scan2Deploy Studio, which allows you to create the “Application Policies” you need.
You can create different policies for each application, defining specific scanning configurations.
When an app is in the foreground, its specific scanning parameters are automatically loaded.
When you switch to another app, the settings change accordingly.
In your specific case, you can:
- Create a policy associated with the first app, setting ‘TAB’ after scan
- Create a second policy associated with the other app, setting ‘ENTER’ after scan
Here’s a basic example of how to create an application policy:
-
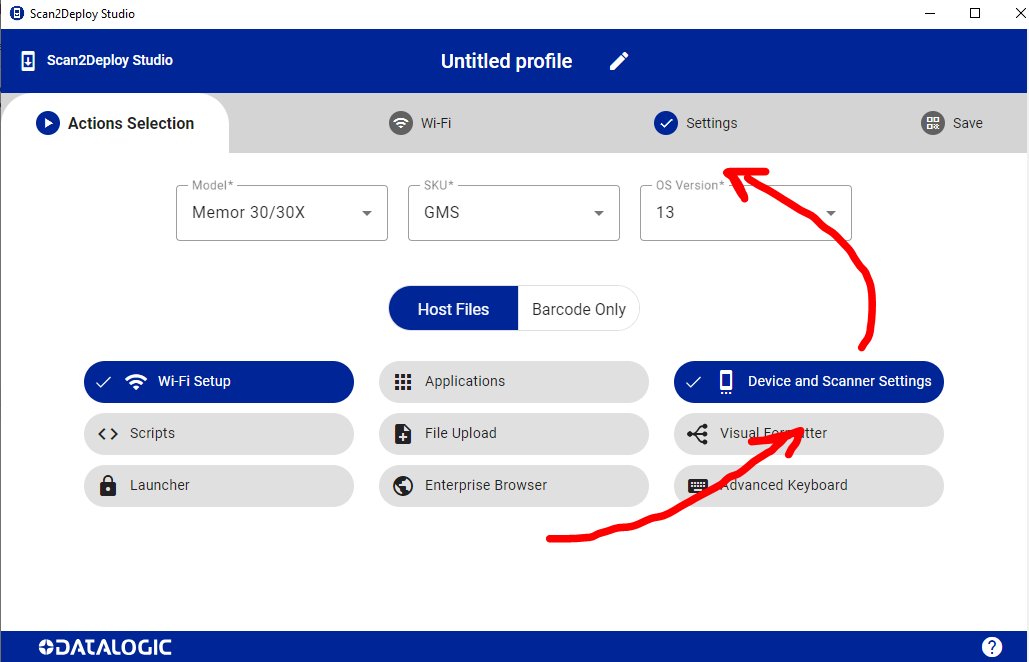
Open Scan2Deploy Studio
-
Create a New profile
-
Add the “Device and Scanner setting” action
-
Go to the “Device and Scanner setting” page:
Here you can:
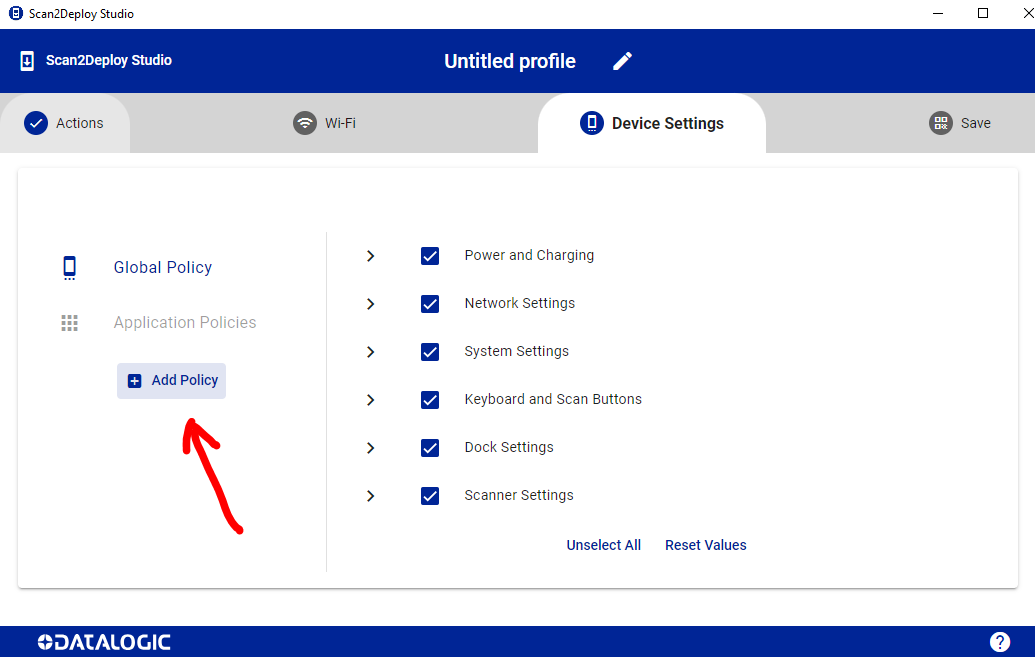
– optionally define the “Global Policy” that is the base device configuration (unselect all settings you do not need to change from their device default)
– add new “App-policies” (configuration changes) for the apps that need specific configuration.
-
Click the "Add Policy " button to create a new policy:
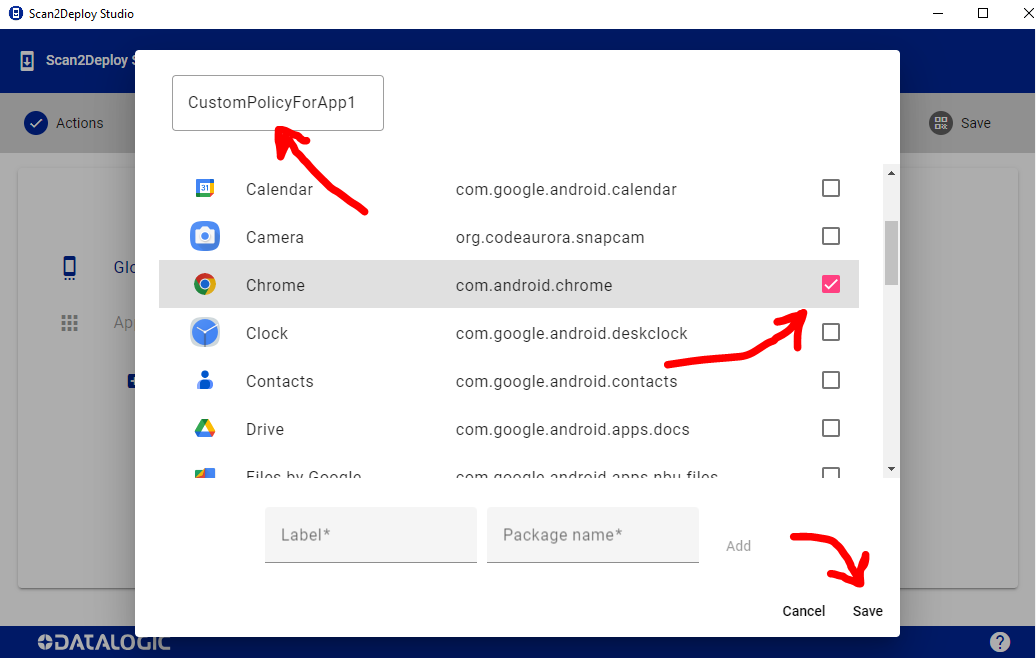
In the popup window:
.
– Give your policy a name (e.g., “TabAfterScan”)
– Select your application by checking its checkbox in the list
.
Note: If your app isn’t listed, add it manually by entering:
- Application Label (e.g., “MyInventoryApp”)
- Package Name (e.g., “com.company.inventoryapp”)
-
Click “Save” to create the policy.
-
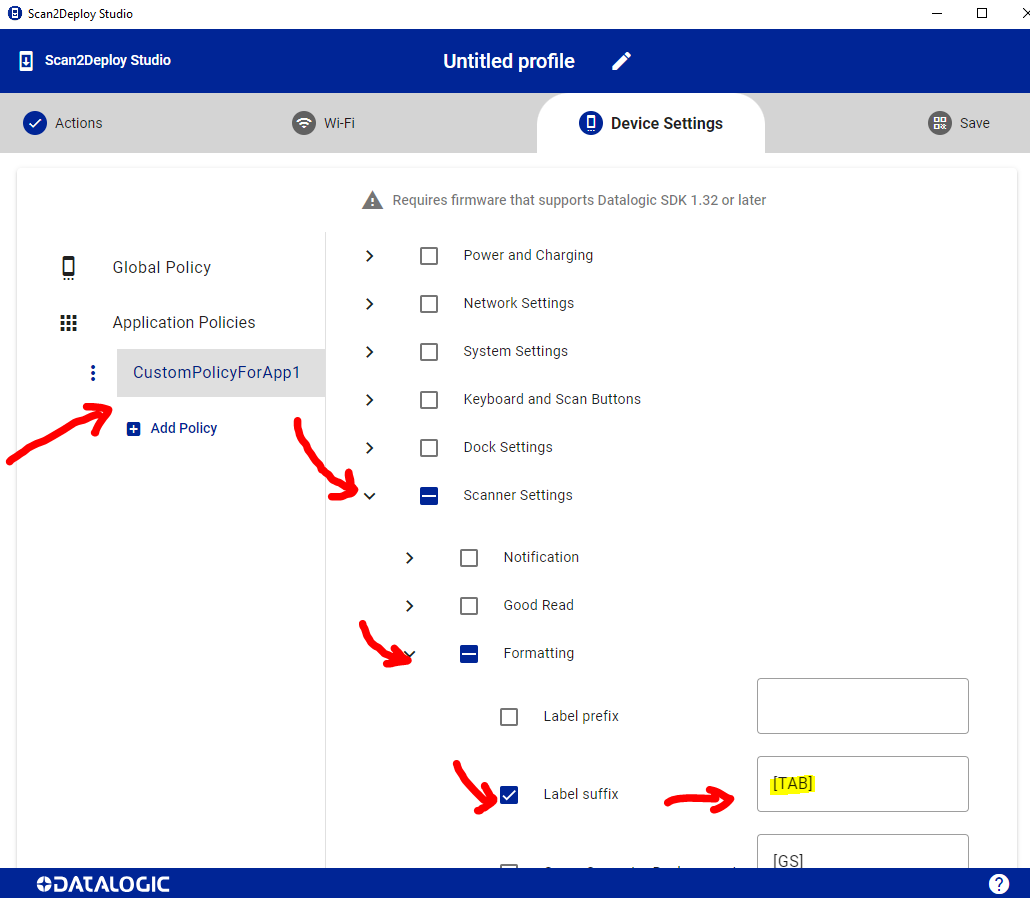
Select your newly created policy and modify the scanning settings on the right side:
– Find the “Scanner Setting” / “Formatting” section
– Configure the “Label suffix” settings to add a [TAB] after scan:
-
Repeat the same steps for your second application.
More information on Scan2Deploy Application Policies can be found here: Scan2Deploy Application Policies .
If you require more specific support, get in contact with our local technical support team, by completing the module at this link (english version) . One of our engineers will provide you with all the information you need.
Simone Callegari
Datalogic Mobile Products - L3 Specialist SW Engineer
1 Like
Hi Simone,
Excellent explanation!!
Thanks for the quick and thorough response.
I first was using “Barcode Only”, but I needed to select “Host Files”.
We’re currently testing this with the customer.
I think this will absolutely work!
Kind regards,
Jorrit van Baak
1 Like