The configuration of a Datalogic device can be done in different ways: S2D, EMM+OEMCOnfig or SDK. Recently, a new method was introduced based only on sending Intent directly to the system.
Applies to:
Devices that integrate SDK ver 1.29 (only method 1), devices that integrate SDK ver 1.32 (any methods). Some properties may not be available on all devices.
Starting from SDK version 1.29, in the class Intents, an action intent called ACTION_CONFIGURATION_COMMIT is exposed.
The ACTION_CONFIGURATION_COMMIT Intent can be used to apply a configuration to a Datalogic device.
It is possible to pass to this Intent an extra, as an input, called EXTRA_CONFIGURATION_CHANGED_MAP.
That extra accepts an Object Map with the schema Map<Key, Value>, which will contain the list of parameters to be modified. The “Key” of the Map<Key, Value> is an Integer that represents the ID of the property, the “Value“ is represented by a String.
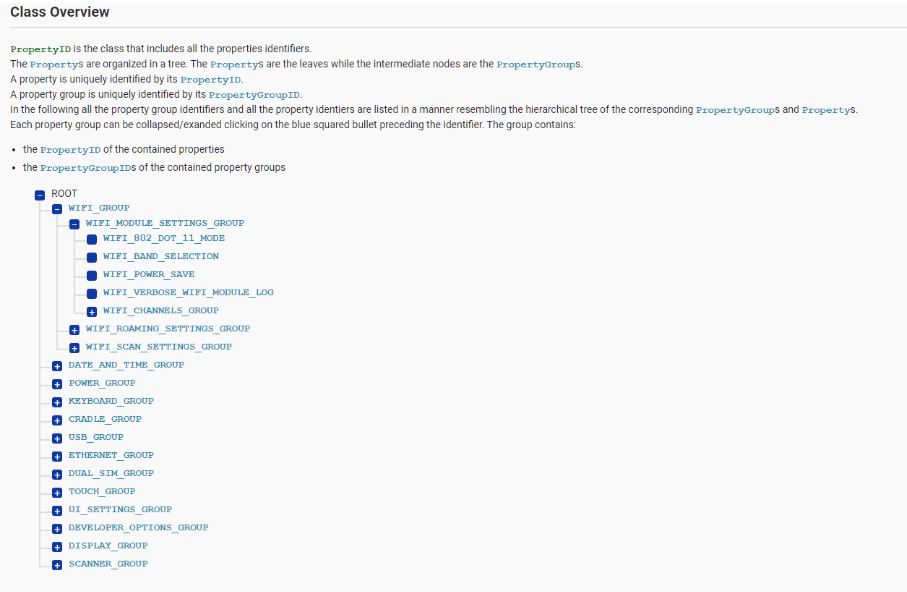
This is the list of the available parameter PropertyID:
https://datalogic.github.io/android-sdk-docs/reference/com/datalogic/device/configuration/PropertyID.html
For some devices, especially for properties that do not involve the Scan Engine, a reboot is required.
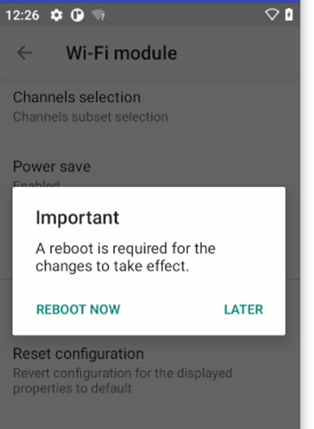
When a property that requires a reboot is set, the system sends an ACTION_CONFIGURATION_BOOT_REQUIRED Intent, or, if the setting is done through UI, the following message is showed:
---- Example ----:
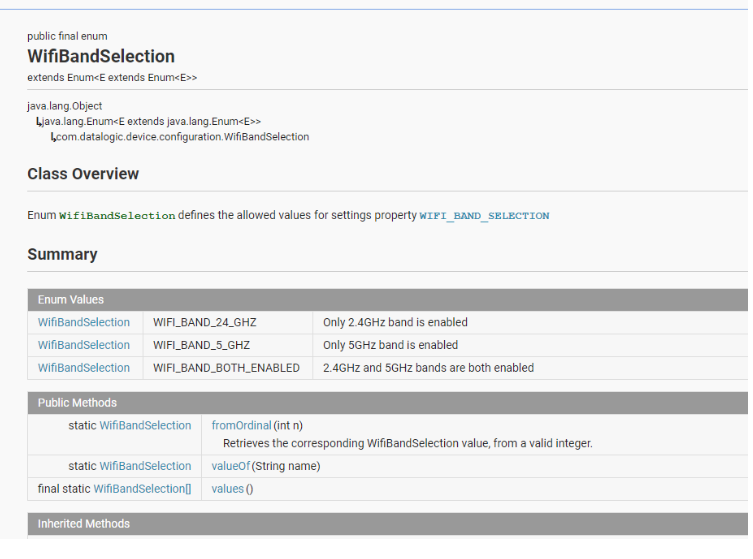
- Enable only the 2.4 GHz Wi-Fi band (note: this setting will require a reboot).
- Disable the code 128 family.
(reference device: Joya Touch 22)
-
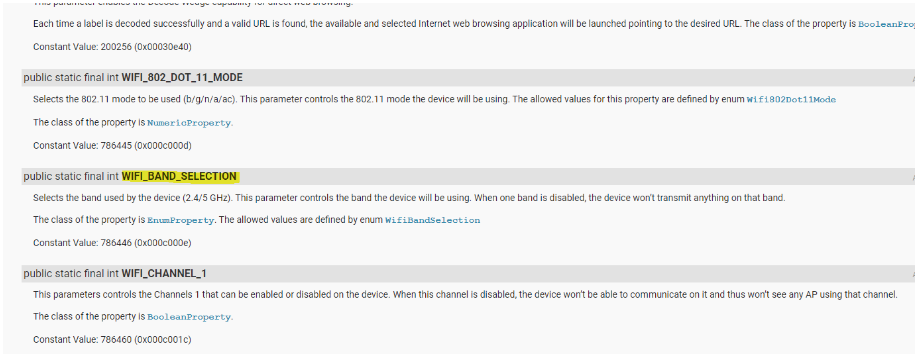
Looking at the Datalogic SDK (Java/Kotlin) reference documentation, in the Class under “WIFI_GROUP” You can find the option “WIFI_BAND_SELECTION”,
The “Key” is “WIFI_BAND_SELECTION”
And “WIFI_BAND24_GHZ” is the “Value” to insert as a String.
-
On the same tree, by searching for Code128 in the tree, you can easily find the PropertyID and the value for disabling the Code128 symbology:
.
ROOT / SCANNER_GROUP / s1D_GROUP / CODE128_GROUP / CODE128_ENABLE
.
public static final int **CODE128_ENABLE**
Added in revision 32
This parameter enables or disables the symbology.
The class of the property is BooleanProperty.
Constant Value: 1032 (0x00000408)
.
With these information, build a Configuration Intent with this schema:
-
Broadcast action:
com.datalogic.device.intent.action.configuration.COMMIT
-
Intent EXTRA (String or List):
com.datalogic.device.intent.extra.configuration.CHANGED_MAP [Key=value],[..]
That Configuration Intent can be sent to the system in different ways:
2 Likes
Method 1 - Send a Datalogic SDK configuration Intent via code (Java/Kotlin)
Datalogic SDK v1.29 required.
- Send an intent as following:
import com.datalogic.device.configuration.PropertyID;

Intent intent = new Intent(Intents.ACTION_CONFIGURATION_COMMIT);

HashMap map = new HashMap();
map.put(PropertyID.WIFI_BAND_SELECTION, WifiBandSelection.WIFI_BAND_24_GHZ.toString());
map.put(PropertyID.CODE128_ENABLE, "false");
intent.putExtra(Intents.EXTRA_CONFIGURATION_CHANGED_MAP, map);
mContext.sendBroadcast(intent);
- Reboot the device to apply the configuration.
Method 2 - Send a Datalogic SDK configuration Intent via ADB:
Starting from SDK version 1.32 the extra can also be passed as a String or a list of String,
see this link.
Example:
Send a configuration Intent via ADB with the extra data as a List
adb shell am broadcast -a com.datalogic.device.intent.action.configuration.COMMIT --esal com.datalogic.device.intent.extra.configuration.CHANGED_MAP "WIFI_BAND_SELECTION=WIFI_BAND_24_GHZ,CODE128_ENABLE=false"
Example:
Send a configuration Intent via ADB with the extra data as a String
adb shell am broadcast -a com.datalogic.device.intent.action.configuration.COMMIT --es com.datalogic.device.intent.extra.configuration.CHANGED_MAP "WIFI_BAND_SELECTION=WIFI_BAND_24_GHZ,CODE128_ENABLE=false"
Note: Changing certain parameters may require a device reboot before they are applied. In that case, reboot the device to apply the configuration.
Method 3 - Send a Datalogic SDK configuration Intent via EMMs:
The Datalogic SDK configuration Intents, can also be sent through an MDM that support Intents:
Examples:
SOTI:
sendIntent -b “intent:#Intent;action=com.datalogic.device.intent.action.configuration.COMMIT;S.com.datalogic.device.intent.extra.configuration.CHANGED_MAP=WIFI_BAND_SELECTION=WIFI_BAND_24_GHZ,CODE128_ENABLE=false;end”
Reboot the device to apply the configuration.
Workspace ONE:
The syntax used by Workspace ONE doesn’t allow to translate the Intent from ADB to the Workspace ONE syntax like this:
mode=implicit,broadcast=true,action=com.datalogic.device.intent.action.configuration.COMMIT,extraString=com.datalogic.device.intent.extra.configuration.CHANGED_MAP=WIFI_BAND_SELECTION=WIFI_BAND_24_GHZ,CODE128_ENABLE=false ( ← SYNTAX not working on Workspace ONE!)
The agent is not able to parse, so you need to pass through S2D Studio:
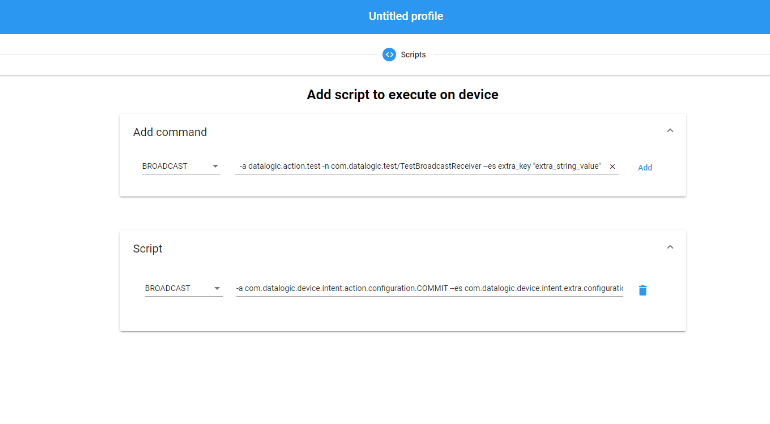
- Create a S2D Profile (see more) and in the “Scripts” section add the “BROADCAST” command:
-a com.datalogic.device.intent.action.configuration.COMMIT --es com.datalogic.device.intent.extra.configuration.CHANGED_MAP “WIFI_BAND_SELECTION=WIFI_BAND_24_GHZ,CODE128_ENABLE=false”
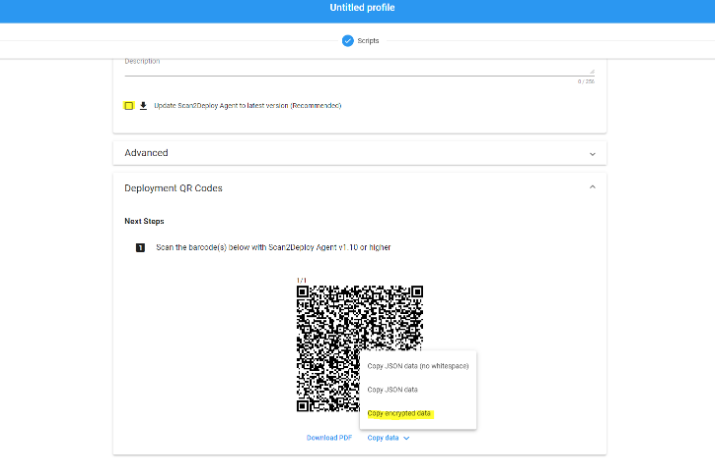
- In the last step of the creation of the profile you can remove the update of S2D agent, in this way you will not need to download any file to your device.
- Copy the encripted data and pass them to the extraString=data=pasteEncryptedDataHere.
mode=explicit,broadcast=true,action=datalogic.scan2deploy.intent.action.START_SERVICE,package=com.datalogic.scan2deploy,class=com.datalogic.scan2deploy.S2dServiceReceiver,extraString=encoding=v2,extraString=data= T0lRjchz74fNiI4YUO0Xf6vEScCP8pp8Fj3aUMp4I//qgdP/iTJqlEpBFyCGffEM+yFcUmIzMIYMZN/mRKNIBUtxlAWW3hN+vswfNJX1qhSX3hCXPKYT39XGlm72RkYItZoKVNUwjDULMIbFfKcIeGCMdZJNs2pDBIzHQDgAmOWmktViXXy90fa184xE99CpVZG8lglAYd9GDQHvF5ZF11DvMylC5a2iX0VbL2LeW+eSLfECgYVaX42e9Noww+PJCgMYMBaBMLcgbd9qhFHpyxf1nxuAQXX8ysyDD4b1uwusxZhteOR8nFDH7S37Ay8dP4NdQRJh3IqtWLEayecUYtwKVMbNJLqryrMD6n613rgTQt2sWOBzWwzZVx6fdAZQ9KtnDEz1+iM3ZQICkt5zV6ZMNy8HvJawRoOe62WUQHqHfGSAGvlyVnCOxS8oCQQnwpALI6AIY3bGwQQDGksUG+HcRXhVevK9RmKkbk4ckT9Vhuxrs4fQc6ZySLl91C8N
- Reboot the device to apply the configuration.
See Also:
Donato Cataldo
L3 Mobile Computer Support Engineer